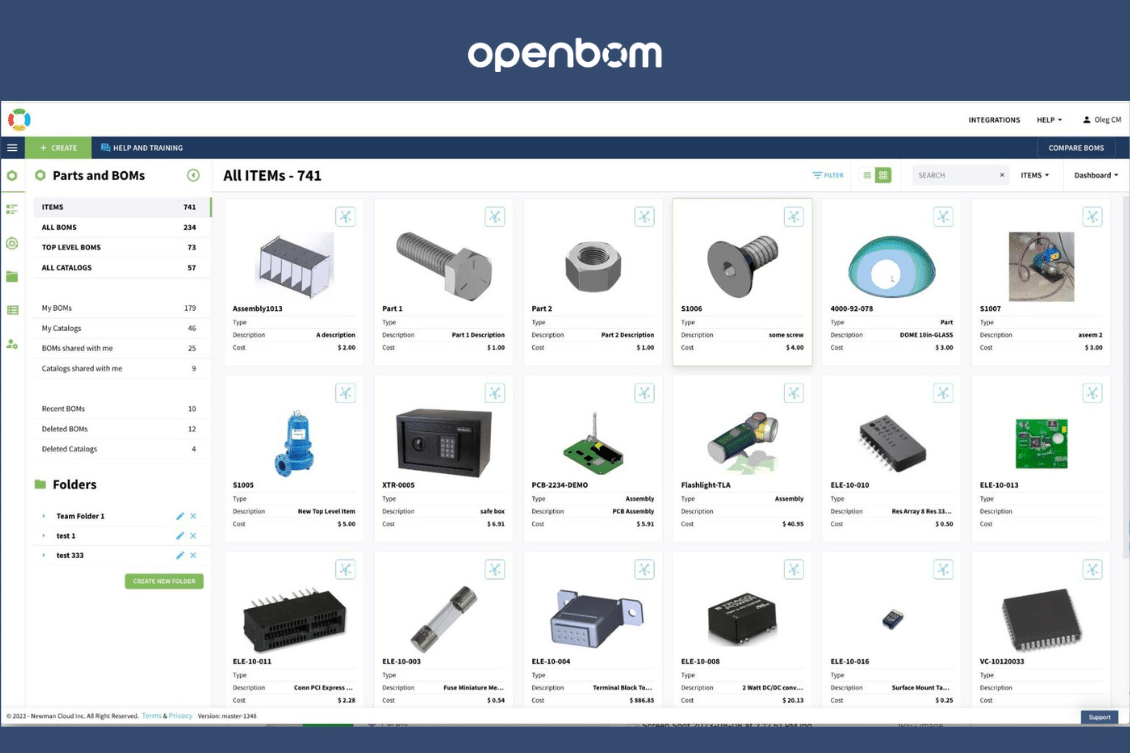
Images are one of the coolest features of the OpenBOM user experience, making data visual and self-explanatory. From the very beginning of OpenBOM, we have prioritized image and visual expression as important elements. Our customers love that images can be added to any data element – catalog item, BOM, order, PO, etc.
While images are aesthetically pleasing, they also significantly reduce the chances of making a mistake and improve the efficiency of work for engineers, manufacturing planners, purchasing, and assembly teams.
Here are a few examples of how you can see images in the OpenBOM user interface. Check the image above (Items dashboard). Below you can see examples of how OpenBOM uses images in catalogs, BOMs, and Graph Navigator user interfaces.
Grid and Side panel is a standard way to show data including images.
You can resize images by resizing the image column in the grid.
You can see images in Graph Navigator as well.
Earlier this week, I was asked how to load images to OpenBOM automatically. In this blog, I want to talk about 5 possible ways to load images to OpenBOM.
1. Load Automatically Using CAD Add-Ins
This one is probably the most popular method. It is automatic and easy. OpenBOM CAD add-ins facilitate the seamless integration of images for any data you load from your CAD system. Simply install the appropriate CAD add-in, and your images will automatically sync with your OpenBOM data as you make updates to your designs.
Learn more about OpenBOM CAD Add-ins here.
2. Load Images Manually with the Image Edit Command
This method allows you to select an image from your disk and load it directly into OpenBOM. To do this:
- Navigate to the item you wish to add an image to,
- Select the ‘Image Edit’ command,
- Browse your file system,
- Select the image you wish to upload, and confirm.
The chosen image will be added instantly to the selected item.
3. Copy/Paste
Copying and pasting images directly into OpenBOM is an easy and fast method. To do this:
- Right-click on an image in your browser or another location and select the ‘Copy Image’ function,
- Move to OpenBOM, position your cursor in the desired image property field,
- Press Ctrl-V (or Cmd-V on Mac) to paste the image.
4. Import Images using Excel or Google Sheet
For users who manage data in spreadsheets, this feature is highly convenient. Here’s how:
- Use the “in-cell” image feature of your spreadsheet application to insert images,
- Save your spreadsheet with the images included,
- Import this spreadsheet to your OpenBOM catalog (or BOM).
OpenBOM will read the images from the spreadsheet and add them to the corresponding items in the catalog or BOM.
Learn more on how to import Excel or Google Spreadsheets.
5. Use REST API to Upload Images
For users with programming skills or integration needs, OpenBOM’s REST API is a robust solution. By utilizing the API, you can write scripts or integrate other systems to automatically upload images to your OpenBOM catalog or BOM. Detailed documentation on how to do this is available in OpenBOM’s REST API help section.
Conclusion
Images are not only useful for improving the visual appearance of your data but are instrumental in eliminating the risks of mistakes. They provide an intuitive, clear, and efficient way to reference parts and assemblies, which is crucial for avoiding costly errors in production.
OpenBOM allows you to add multiple images in a variety of forms and ways, offering you the flexibility to visualize your data in the most convenient and effective manner for your workflow.
To experience these features firsthand, REGISTER FOR FREE and start an OpenBOM 14-day trial to learn how OpenBOM can help you improve your processes and decision-making with visual, interactive, and accurate data.
Best, Oleg
Join our newsletter to receive a weekly portion of news, articles, and tips about OpenBOM and our community.


