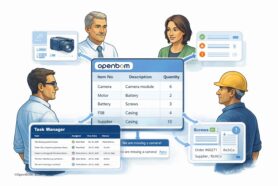
Ease of use and friendly user experience are becoming super critical for any software environment. If you’re familiar with older PLM systems, you should remember that the setup of those systems can take a substantial amount of time.
At OpenBOM, we prioritize the way users and customers can easily start an account and use the system by providing an intuitive user interface combined with simple and robust data modeling concepts. We adopted a familiar spreadsheet concept that makes working with OpenBOM much easier compared to other enterprise PLM systems.
OpenBOM offers powerful tools to streamline processes and enhance collaboration. However, to realize the full potential of OpenBOM, mastering the initial setup tasks is essential. The initial setup tasks will simplify the work of other users and prevent them from potential mistakes.
In this article, I will share 5 essential OpenBOM setup tasks every administration must do before letting any other user do something in the system. We recommend following these steps before you invite users and start importing data and CAD files to the system.
Plan for Data Properties:
Before diving into OpenBOM, take the time to plan your data properties carefully. Consider the specific information you need to track for each item or part in your inventory. By defining custom properties such as part numbers, descriptions, quantities, and other relevant attributes, you’ll ensure consistent data organization and easy retrieval.
OpenBOM provides support for different simple data types such as text and number, but also more complex data such as lists, images, file attachments, etc. Read more about it here.
Plan for Item Classification:
Efficient item classification is the cornerstone of effective product information management. Set up catalogs and establish clear part number (PN) conventions to categorize your items logically. Consistency in item classification simplifies search and retrieval processes, minimizing errors and saving valuable time during data entry and analysis.
OpenBOM provides a simple mechanism for catalog creation. We recommend creating catalogs for basic item types (eg. Mechanical, Electrical, Assemblies, etc.) The setup is flexible and allows you to manage both the right set of properties and Part Number setup for each catalog. Read more about it here – Organizing Data in Catalogs.
Design Your First BOMs and Set Up BOM Templates:
With your data properties and item classifications in place, design your initial BOMs (bill of materials) within OpenBOM. Create BOM templates tailored to your organization’s specific needs, considering factors such as product structure, assembly hierarchies, and component relationships. These templates will serve as the foundation for future BOM creation, ensuring consistency and efficiency across projects.
The following four steps are essential: (1) configure catalogs to be used with the BOM; (2) add a test item (you need to add an item to the catalog before the test to ensure Part Numbers are generated correctly; (3) check the properties; (4) save the template.
Define Views and Share with the Team:
Customize data views within OpenBOM to display information relevant to different stakeholders. Whether it’s a high-level overview for executives or detailed specifications for engineers, tailor views to meet each team member’s requirements. Share these views securely with the team, enabling seamless collaboration and alignment on project goals. You can learn more about user defined views here.
Although views are optional, we highly recommend creating them on the admin level and making them available for all team members. It will simplify the user experience and won’t require the creation of views by each user.
Create a new view
Then add properties using an automatic mechanism and delete what you don’t need.
Create Sample Data in OpenBOM and Test:
With all setup tasks complete, you’re now ready to start populating your data in OpenBOM. Enter item details, upload supporting documents, and associate components to build comprehensive BOMs. I recommend for testing purposes these steps – (1) create an item in every catalog to ensure Part Numbers are configured properly; (2) create a test BOM with multiple levels and items from multiple catalogs to ensure properties are configured correctly; (3) test formula and calculations to ensure all properties are aligned; (4) check views. Only after you’re done, navigate to the Admin dashboard and invite users.
Following these five essential admin setup tasks helps to ensure a smooth start with OpenBOM for your team.
Another good idea can be to delete Sample Demo Data from an OpenBOM account, so it won’t confuse users and won’t mix with your company and product information.
Conclusion:
Mastering these essential admin setup tasks is crucial for a successful OpenBOM implementation. By carefully planning data properties, item classification, BOM templates, views, and data creation processes, you lay the groundwork for streamlined operations and effective collaboration within your organization.
In the next article, we’ll explore how to set up teams within OpenBOM, further enhancing collaboration and productivity across projects.
Stay tuned for more insights on maximizing the potential of OpenBOM for your organization’s success.
REGISTER FOR FREE to check OpenBOM and explore how it can help your organization.
Best, Oleg
Join our newsletter to receive a weekly portion of news, articles, and tips about OpenBOM and our community.


